To synchronize an ITSM support group and its members to Helix Portal, please follow the steps below:
1. Log in to Mid Tier with Admin privileges:
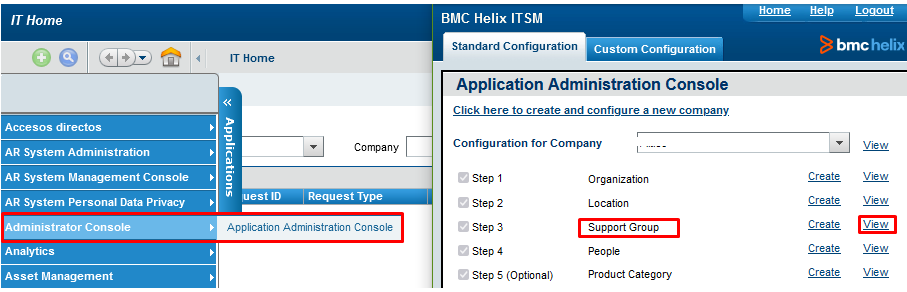
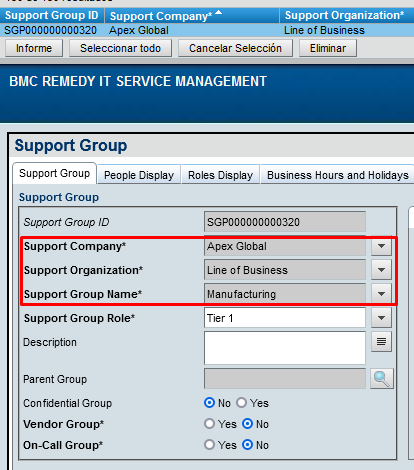
2. Go to the CTM:Support Group form, to locate the name of the support group that needs, to be synced, this form can be opened by the following path Applications > Administrator Console > Application Administration Console > Support Group:
Note. The Manufacturing Support Group will be used for this example:
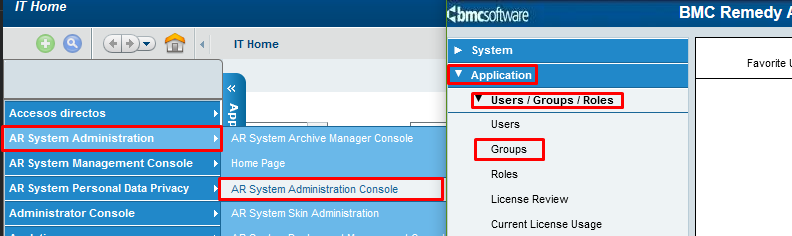
3. Once the support group name is known, go to the Group form to locate the corresponding Group ID, follow the path Applications > AR System Administration > AR System Administration Console > Application > Users / Groups / Roles > Groups:
3.1 Search the Support Group using the Long Group Name field as below:

3.2 Verify the hierarchy of the Support Group (Company and Organization) which should be the same as the CTM:Support Group form:
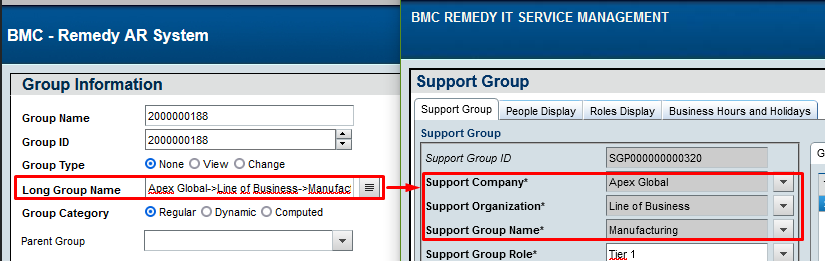
3.3 Copy the Group ID value:
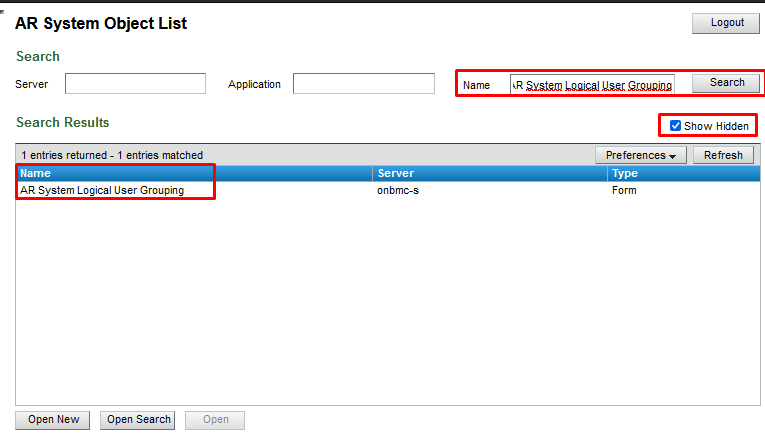
4. Open the AR System Object List form with the URL https://[myservice].onbmc.com/arsys/forms/ and search AR System Logical User Grouping form and open it, make sure to enable the Show Hidden checkbox.
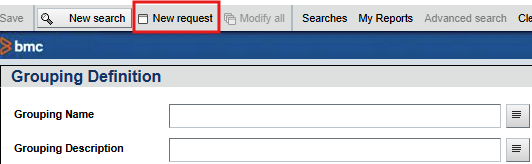
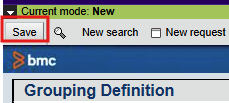
5. In the AR System Logical User Grouping form, switch to New Request mode:
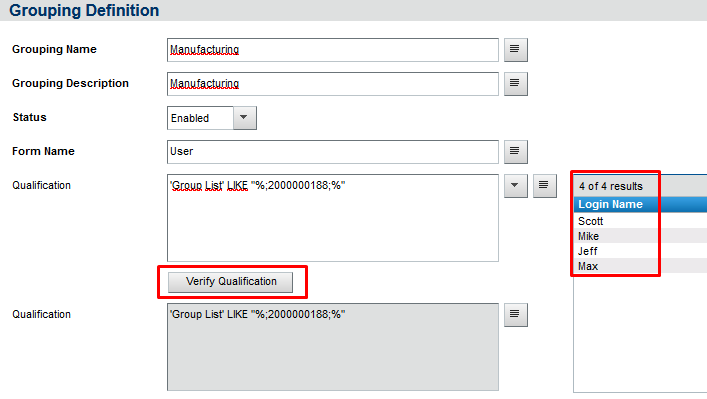
5.1 Complete the fields as in the example below and then press the Verify Qualification button to update the table with the members that belong to the Group and verify that all looks as expected:
5.2 Click on 'Save' in the upper left side to save the new record:
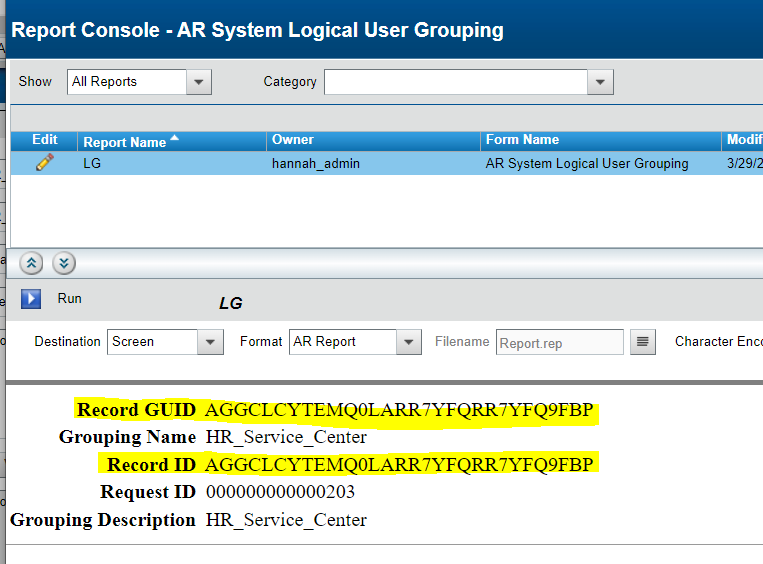
5.3 Capture the Record GUID and Record ID field details as mentioned below:
To create the report and fetch the details of the Field: “Record GUID” or “Record ID” for the above searched Logical Group record, follow the next steps:
- Open the AR System Logical User Grouping form.
- Search for the group name in the Grouping Name field.
- Click the Report button.
- Create a new report by clicking the green "+" icon.
- Assign a name to the report.
- In the new screen:
- Go to the Field tab.
- In the dropdown menu Field to Add Before/After, search and select:
Record GUID → click Add Before or Add After.- Repeat the same step to add
Record ID.
- Click Save to save the report.
- Return to the AR System Logical User Grouping form.
- Repeat steps 2 and 3.
- Select the report you just created.
- Click the Run button.
- You will now be able to view the Record GUID and Record ID fields.
Note the “Record GUID” or “Record ID” into notepad, anyone will do as both are one and the same.
5.4 Copy and note down the value of the Field: “Qualification” from the form : “AR+System+Logical+User+Grouping” into the notepad for future use.
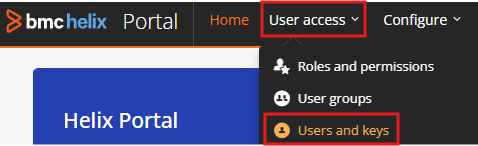
6. Login into Helix Portal using Tenant Administrator
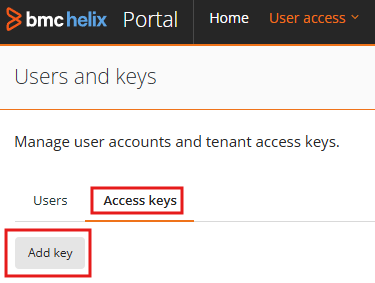
6.1 Navigate to Home -> User access -> users and keys -> Access keys
6.2 Click on Add Key as shown below
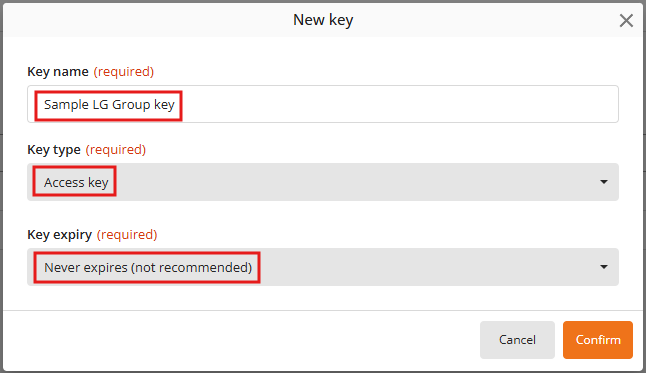
6.3 Type the Key name and select 'Key type' and 'Key expiry' from the drop-down menu of each field as shown below:
NOTE: The 'Key name' can be given as per the convenience, we suggest to use a meaningful name for its easy identification.
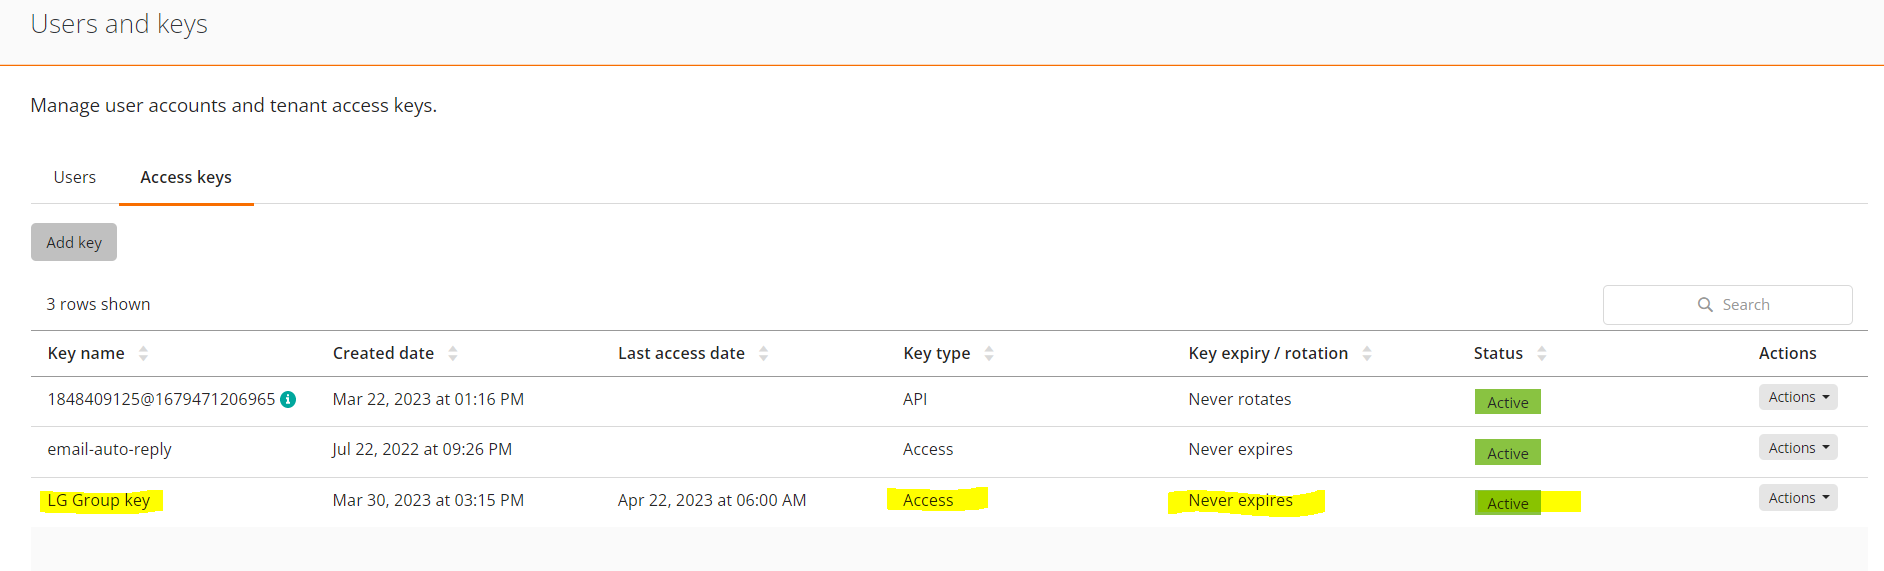
6.4 Click on 'Confirm' and the Key gets generated and is displayed as mentioned below
7. Go to Actions -> Key Details
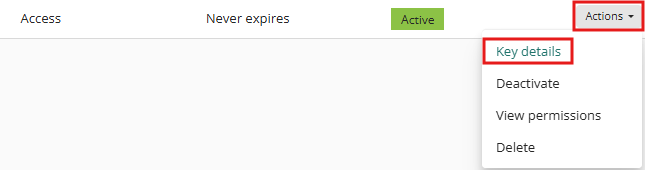
7.1 Click on “Copy key details”
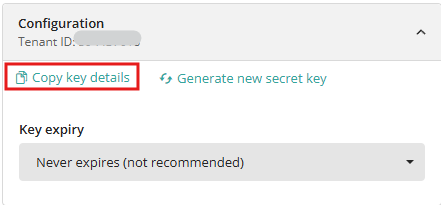
7.2 Paste into Notepad the key details: DBQAZ5TSAWTK0548D1ASU7F47B4T2D::**************************************************,tenant id: 1234567890
7.3 In the above before value: “DBQAZ5TSAWTK0548D1ASU7F47B4T2D” seems to be an Access Key and the one that is mentioned in the place of “*****” seems to be a secret key.
Note the Access Key and Secret key in the notepad for future use.
8. Go to Actions -> Key Details -> click on “Select” next to Groups
8.1 Select Administrators
9. Back to the MidTier, open the form: “AR+System+Webhook”
9.1 Click on “New Request”
9.2 Fill the details as mentioned below
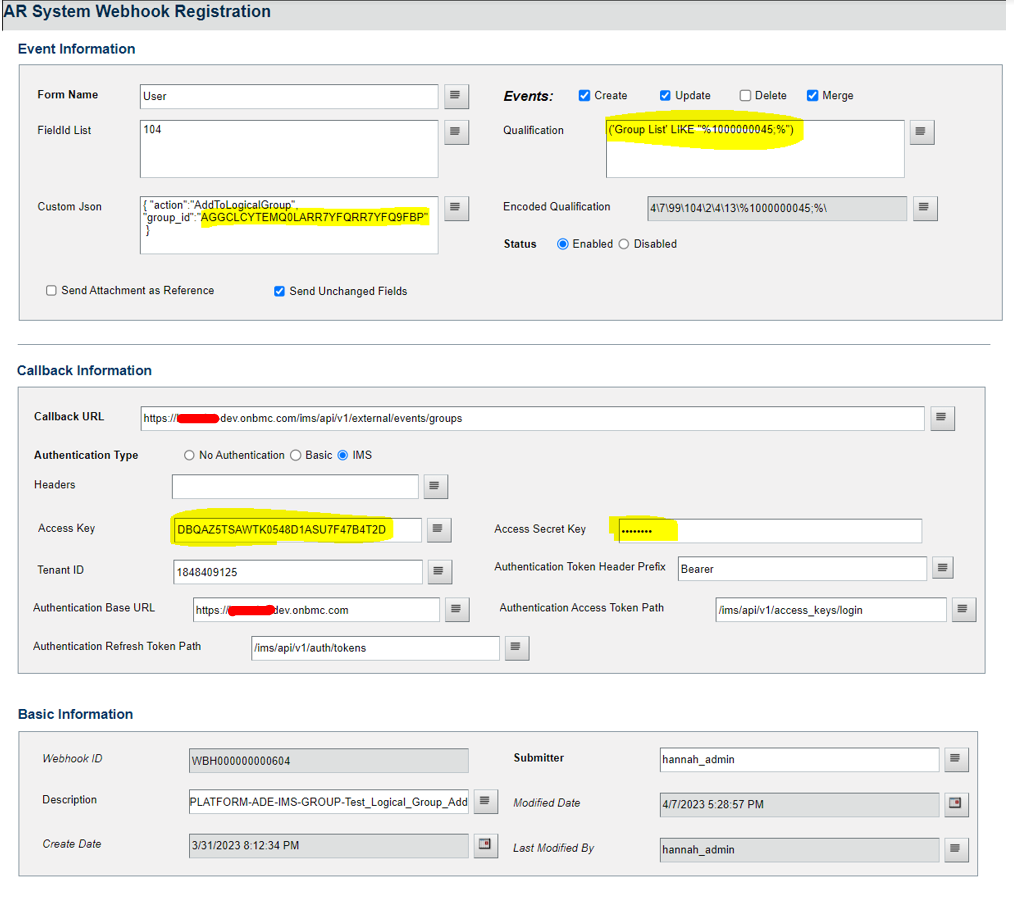
NOTE: -
A) Enter the details captured previously of “Record GUID” in the field: “Custom Jason” as highlighted above. (Refer Step no 2.A)
B) Enter the details captured previously of Qualification in the field: “Qualification” as highlighted above
(Refer Step no 2.B)
C) Copy the details of “Access key” and “Access Secret Key” from the step no 8 into the fields (Access key & Access Secret Key) as highlighted above.
D) Rest fill the details as shown in the above screenshot and make sure to change the customer’s name in respective fields. for example, in Callback URL as shown below
Callback URL: https://Customer-dev.onbmc.com/ims/api/v1/external/events/groups
NOTE: - Replace as mentioned above in all the other fields wherever necessary as mentioned in the above screenshot.
E) Click on “Save”
F) Post performing the above steps all the newly added users in Logical Group in ITSM will start getting sync in Helix Portal Logical group.
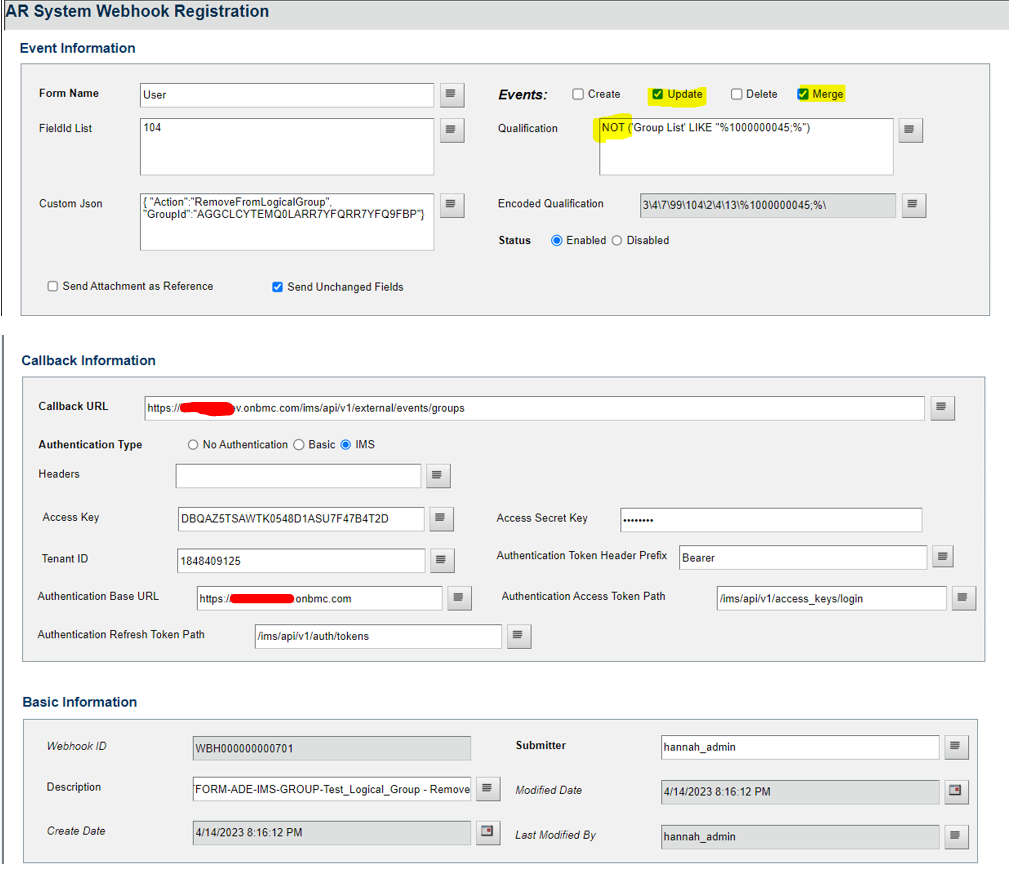
10. For SYNC of user deletion from ITSM Logical group into Helix Portal Logical group create additional entry in AR System Webhook form as mentioned below
NOTE: - Add “NOT” in front of Qualification Value as shown below for Deletion
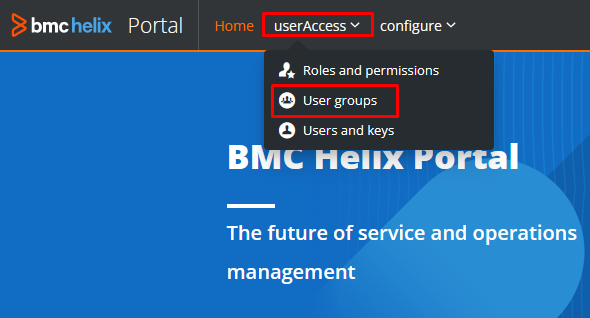
11. Open Helix Portal and go to the userAccess > User groups section:
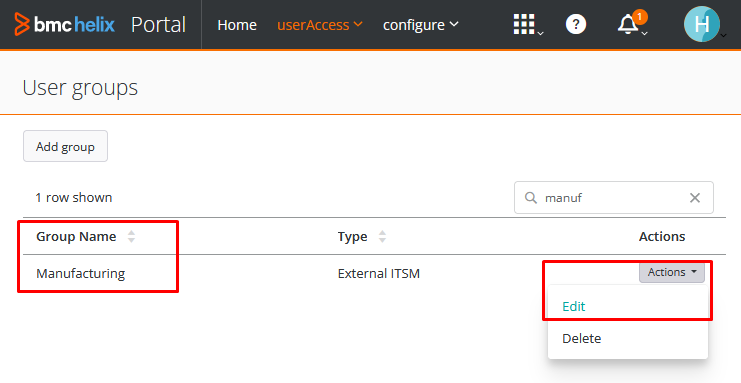
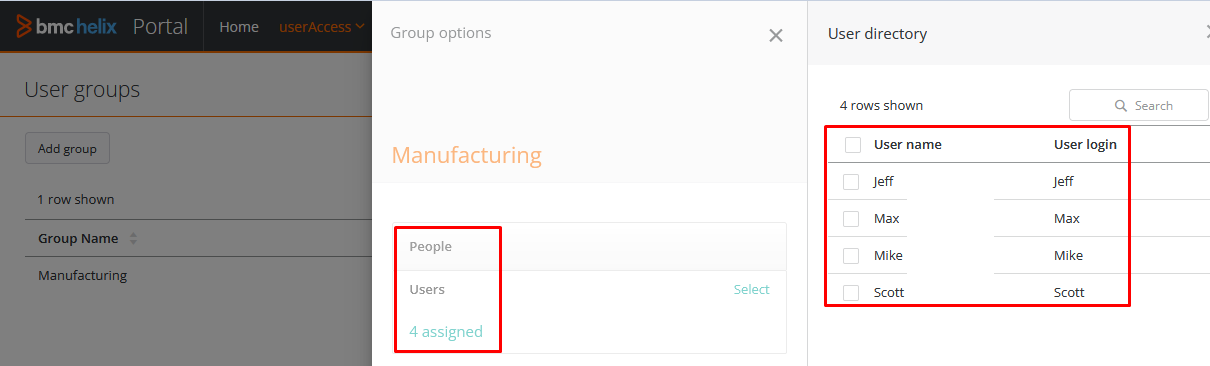
11.1 Verify if the Group was created and then go to Actions > Edit:
11.2 The Edit option will display the list of members belonging to the Group:
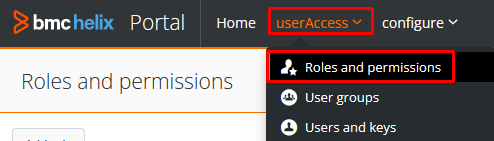
11.3 In order to display the Group in the Teams section of Helix Dashboards, it must be added to the Reporting Role (Admin, Editor or Viewer), go to userAccess > Roles and permissions:
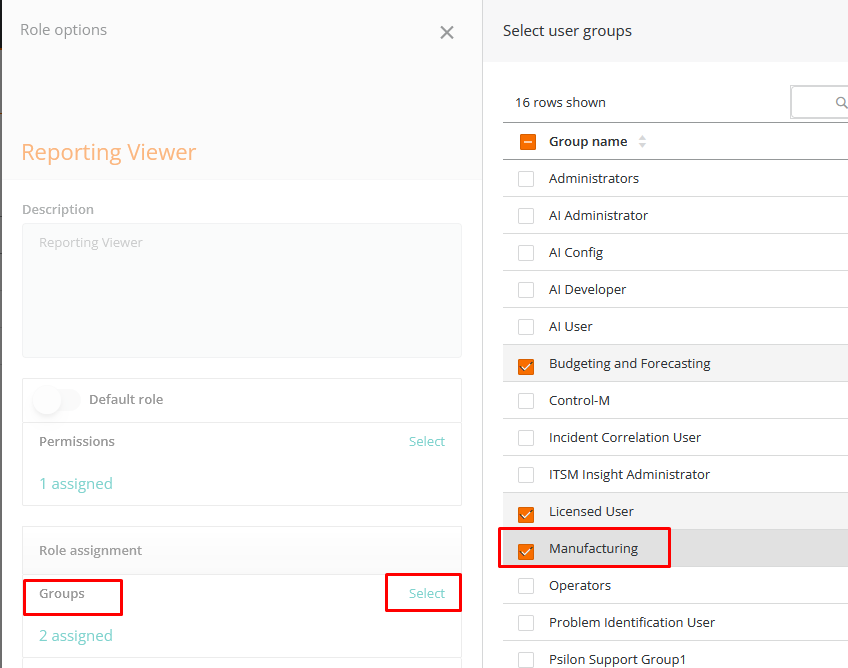
11.4 Select the Role to which the previously created Group will be added and go to Actions > Edit:

11.5 In the Edit option locate the Role assignment section and press the Select option, this will display the list of all Groups, select the corresponding Group and then press the Confirm button to save the changes.
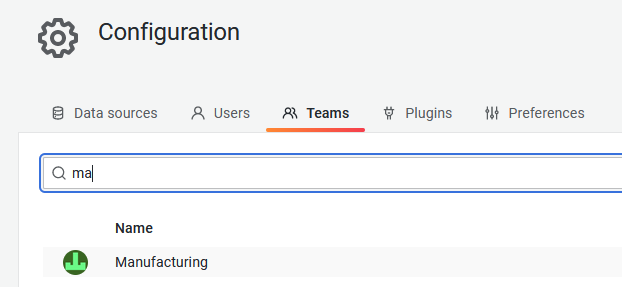
12. Go to Helix Dashboards and open the Teams section to verify the existence of the Group:
See Also: BEST FAQ on Interoperability or Interops in BMC Helix Portal
Additionally, a BMC webinar related: Webinar: Advanced Use Cases With Helix Dashboards - US Session