With this article, you will be able to Authenticate to Helix SSO OAuth2.0 service and obtain an access_token for usage in Helix ITSM REST API through Postman.
Environment variables
There are a few key items we will need for this configuration:
Client ID: <Client_ID> (Provided by BMC)
Client Secret: <Client_Secret> (Provided by BMC)
Callback URL: https://<technical_service>-restapi.onbmc.com/api/jwt/login
Authorization URL: <Helix SSO>/rsso/oauth2/authorize
Token URL: <Helix SSO>/rsso/oauth2/token
To simplify this article, the technical service will be "bmc-it".
PROD: bmc-it-restapi.onbmc.com
QA: bmc-it-qa-restapi.onbmc.com
DEV: bmc-it-dev-restapi.onbmc.com
For the RSSO / Helix SSO URL, you will use the hostname from the BYPASS URL in your environment, for example:
If your BYPASS URL looks like this:
https://sample-sso-prod.onbmc.com/rsso/start?bypass-auth=true&tenant=bmc-it-prod...
If your Helix SSO URL looks Like:
https://sample-sso-prod.onbmc.com/rsso
The previous values will be:
Client ID: <Client_ID> (Provided by BMC)
Client Secret: <Client_Secret> (Provided by BMC)
Callback URL: https://bmc-it-restapi.onbmc.com/api/jwt/login
Authorization URL: https://sample-sso-prod.onbmc.com/rsso/oauth2/authorize
Token URL: https://sample-sso-prod.onbmc.com/rsso/oauth2/token
Request an access_token using Postman
1.- Create a new collection named: "OAuth2.0 Authentication".
2.- For easier readability, configure the following environment variables in the "Variables" section:

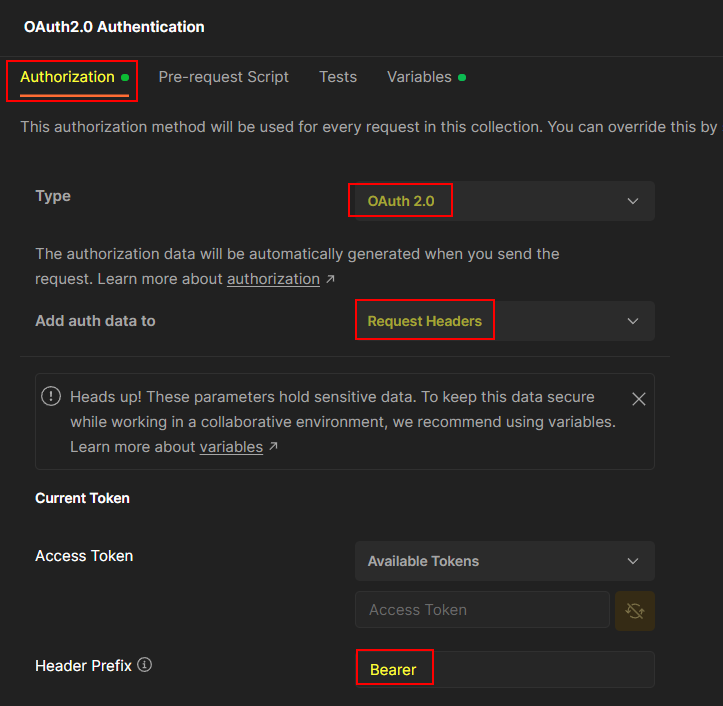
3.- Switch to the "Authorization" section and configure the following values and variables from the previous step:
Type: OAuth 2.0
Add auth data to: Request Headers
Header Prefix: Bearer
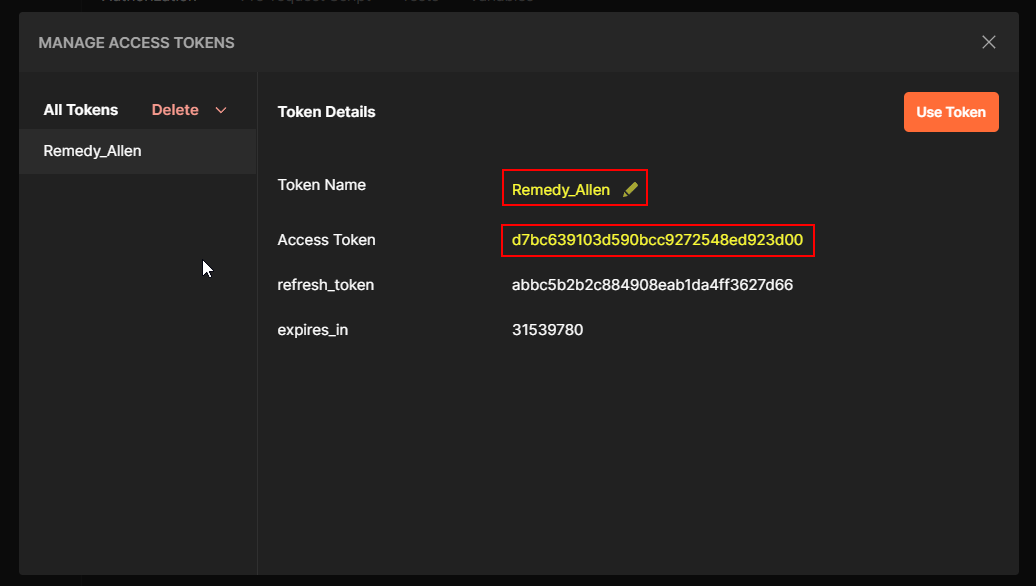
Token Name: (You can create the token name with the service user you will use for authentication, for example: Remedy_Allen)
Grant Type: Authorization Code (Client Credentials are not supported in HSSO)
Client Authentication: Send client credentials in body

Important Note:
This article is written using the Postman Desktop Application, it is highly advised to use this application for testing purposes.
The Postman Browser Extension (Postman Chrome Extension) is deprecated and no longer updated.. if you are testing with this version, it is possible that some features are not present, for example:
The Callback URL section will not have a checkbox with "Authorize using browser". If this checkbox is enabled or not present at all, then, Postman will try to launch an external browser window and use: "https://oauth.pstmn.io/v1/callback".
In order to authorize this Callback URL, BMC has to configure this URL in the HSSO Client ID - Callback URL section and add the hostname (oauth.pstmn.io) into the HSSO
4.- Click in the button "Get New Access Token".
This will open a new browser window in Postman in order to provide the credentials of the user that we will use for authentication:

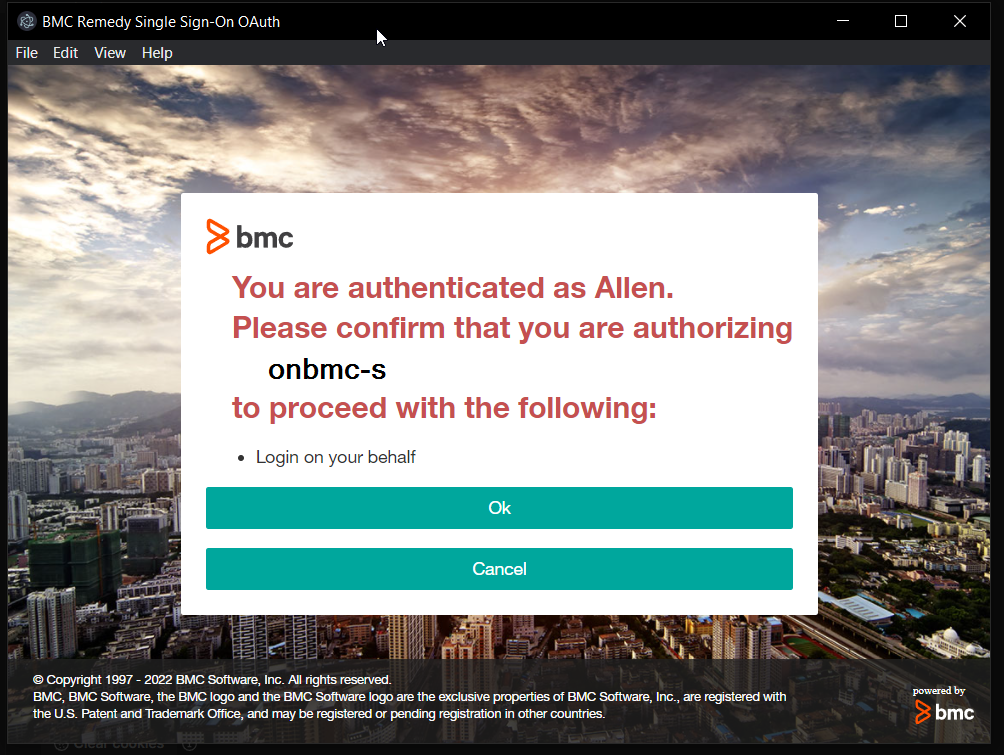
Note:
By using an incorrect username/password if we get an authentication error, you will have to select the option "Clear cookies", then click on the "Get New Access Token" from the previous step in order to re-enter the credentials again.
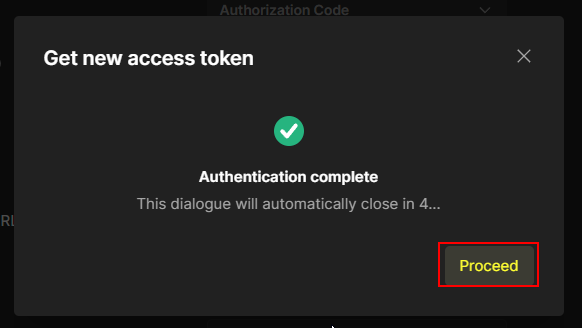
5.- If the authentication is successful, you will obtain a new access_token (Bearer Token) for usage in Helix ITSM REST API:
How to use an access_token in GET / POST / PUT Requests
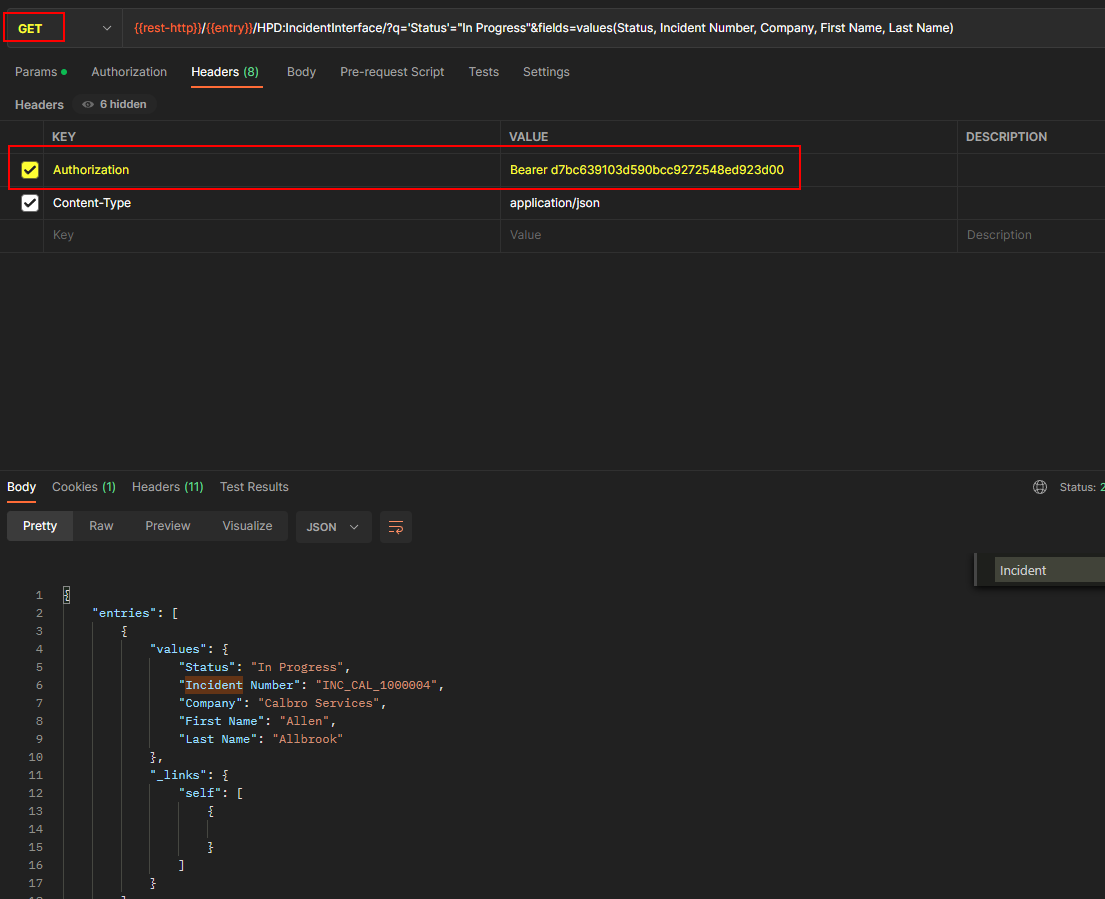
With the access_token previously generated, you need to use a couple Headers in your REST requests:
Authorization: Bearer <access_token>
X-Requested-By: XMLHttpRequest (Only in POST / PUT requests)
GET Request example:
POST Request example:

Note - For SaaS env, you will need to add application domain '
- oauth.pstmn.io' and others in Realm so that right method of authentication is used and no error is thrown